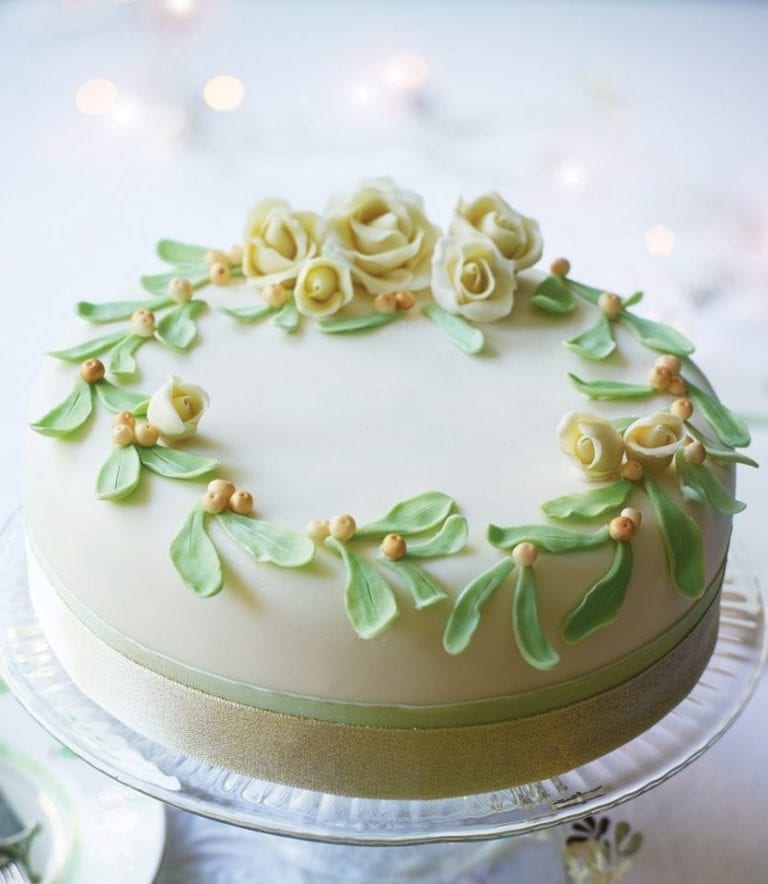
How to make a mistletoe and roses Christmas cake
I have made the mistletoe leaves in shades of green here, but an option would be to make all decorations in shades of ivory (using caramel/ivory colour paste). The choice is yours. You will have some sugarpaste left over.
You will need:
- 400g sugarpaste
- Sugarflair food colour pastes in eucalyptus, lemon/lime, caramel/ivory
- Icing sugar for dusting
- Sugarflair edible lustre powders in royal gold and snowflake
- Clear spirit such as vodka or gin (optional)
- Pot of edible glue (or tube of white royal icing)
You will also need:
- 2 cocktail sticks
- Set of 2 mistletoe cutters (about 2cm and 3.5cm long)
- Boning tool (or use handle of a teaspoon)
- 2 small paintbrushes
- 2 x 70cm lengths of ribbon (3cm wide for the green and 2.5cm for the pale gold)
- Double-sided tape
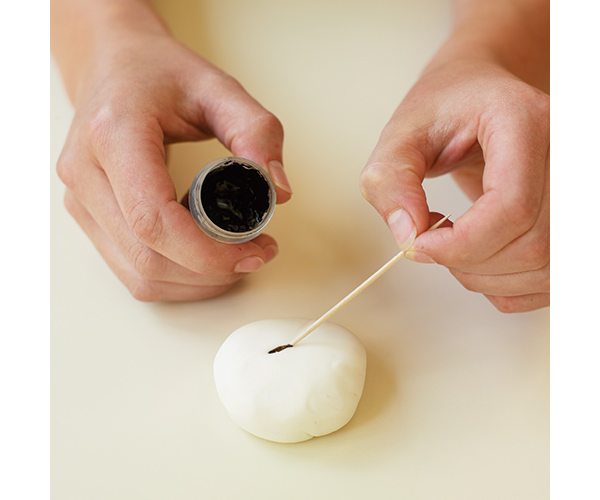
1. Take one-third of the sugarpaste, divide into 3 portions and colour each in a different caramel/ivory tone: dip a cocktail stick or the end of a teaspoon into the caramel/ivory colour paste, paint it onto the sugarpaste, then knead it in. (Colour pastes are very strong; you need only a tiny amount each time.) If the sugarpaste is sticky, work in a little icing sugar. Seal the dyed sugarpaste in polythene bags until ready to use, to stop it drying out.
2. Colour another third of the sugarpaste green, using a mix of the eucalyptus and lemon/lime food colour pastes. Seal in polythene bags until ready for use.
3. Split open a polythene bag along 2 side seams and place it flat on the worktop. To make a rosebud, tear off a cherry tomato-size piece of the darkest caramel/ivory sugarpaste, then remove about a third of it. Form the larger piece into a cone, flatten the base onto the worktop and pinch it in around the middle so you have a cone shape on top of a base.
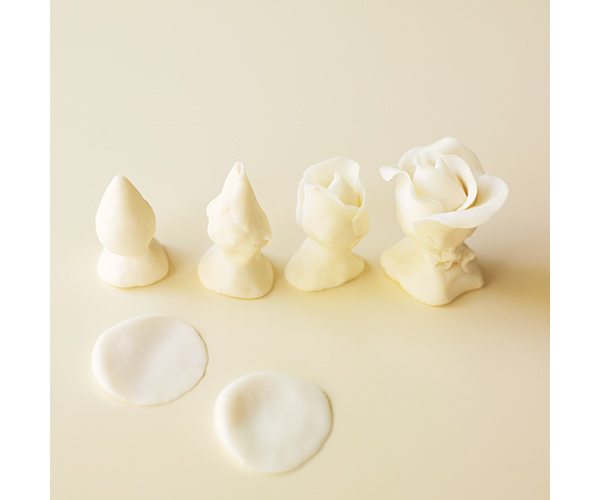
4. Roll about 6 small balls – 3 from the leftover piece of caramel/ivory sugarpaste, and 3 (of the same size) from a lighter tone of sugarpaste – for the petals. Place the balls on one half of the bag, fold over the other half of the bag and, using your fingertip, flatten the balls into round petals, making them thinner on one side. Don’t make them too thin to begin with, as you may find it hard to work with them.
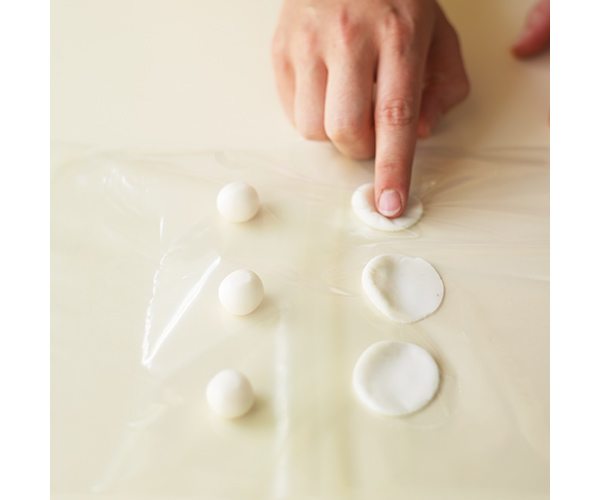
5. Carefully peel back the polythene and, one petal at a time, with the thinnest part always uppermost, fold them around the cone. Start with the three darker petals, each overlapping the last, so the central cone is completely covered, creating a bud.
6. Fold the remaining 3 lighter-shade petals around the rosebud, with the thinnest parts uppermost and each petal slightly open. Repeat to make more small flowers. To make a larger flower, add more petals using the same method, with the lightest shade of caramel/ivory sugarpaste. I made 3 small roses and 4 larger roses. The largest has an extra 5 petals on the outside. With a small knife, cut the flower away from the base at an angle (you can reuse the off-cuts if the paste hasn’t become too dry).
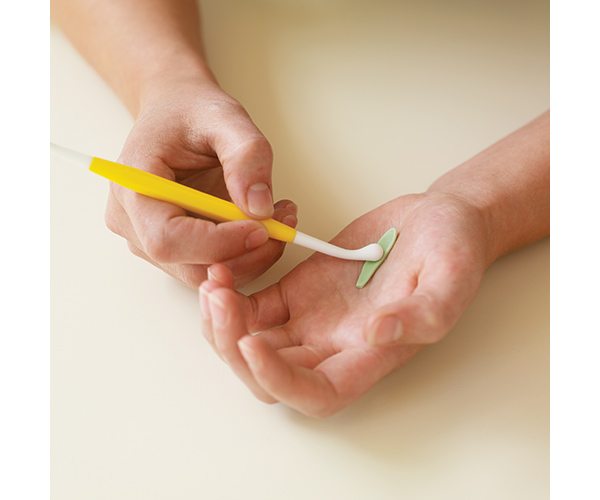
7. To make the mistletoe leaves, roll out the green sugarpaste on a clean work surface lightly dusted with a little icing sugar until 2-3mm thick. Stamp out the mistletoe leaves in pairs of various sizes. One at a time, hold each leaf in the palm of your hand and use the boning tool (or handle of a teaspoon) to stroke down the middle from its curved end. This will make the sides of the leaf curl upwards a little; the harder you press, the more they curl. Make each leaf slightly different. Mark a fine line down the centre of each with the blade of a knife.
8. To make the golden mistletoe berries, roll small pieces of ivory paste into pea-size balls. Use a cocktail stick to make a tiny hole in the top of each. Allow to dry for an hour or so if you have time. Brush the berries with the gold lustre powder. If you prefer a stronger gold, mix the powder with a little clear spirit (vodka or gin). Brush with the enhanced lustre, then allow to dry for 10 minutes.
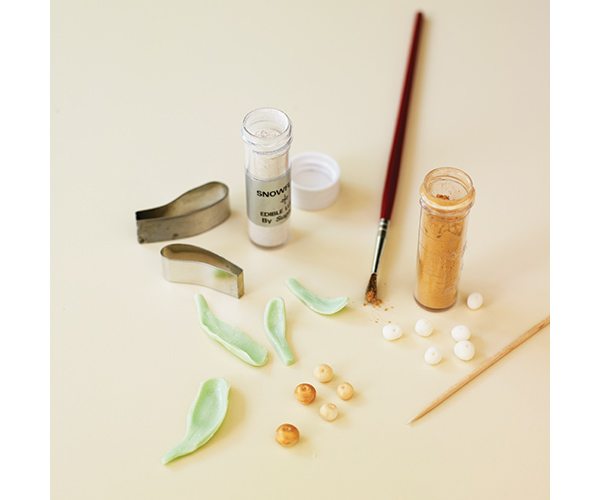
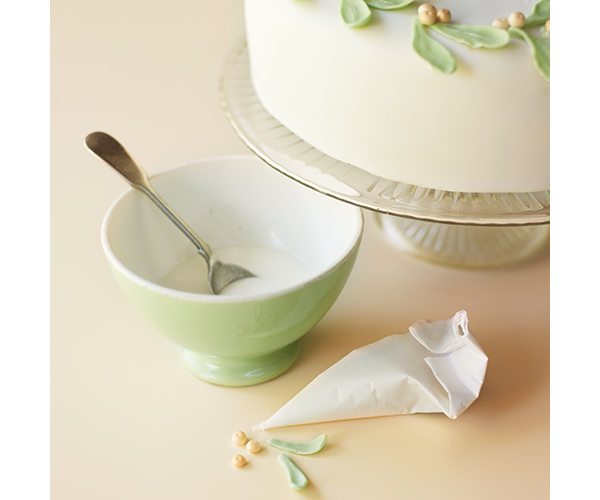
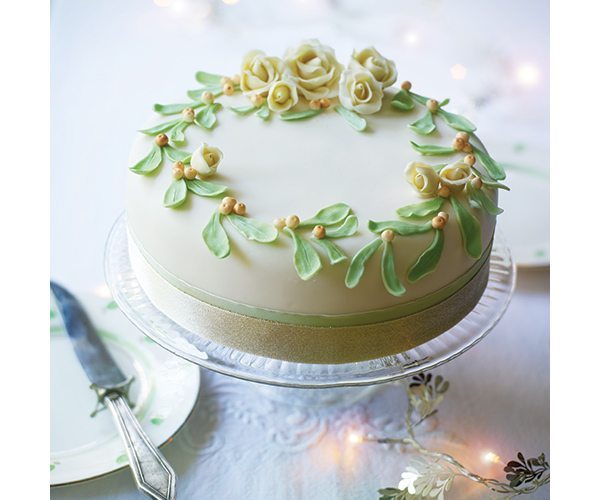
9. When you’ve made all the decorations, use a clean paintbrush and some edible glue (or royal icing) to attach the leaves to the cake, in pairs, in a wreath shape. A light brushing of snowflake lustre powder on the leaves adds a seasonal shimmer to your creation. Add the roses and berries in the same way.
10. Finish the cake with the ribbons, attaching the wider green one first, with double-sided tape at the back. The decorated cake will keep for weeks in a cool dry place. Don’t store in a sealed tin or the sugarpaste will sweat.
Subscribe to our magazine
Food stories, skills and tested recipes, straight to your door... Enjoy 5 issues for just £5 with our special introductory offer.
Subscribe
Unleash your inner chef
Looking for inspiration? Receive the latest recipes with our newsletter
