How to make maple and bacon danish pastries
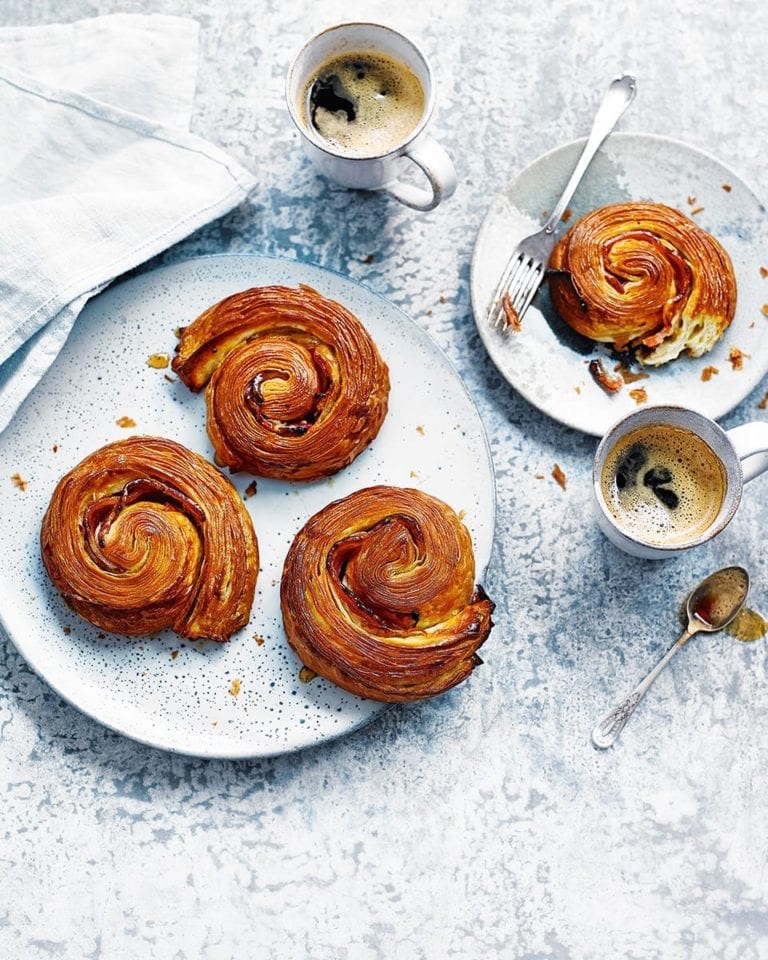
”This recipe was inspired by the US childhood memories of Ollie Gold, founder of Pophams Bakery, where I work. As soon as we tried it, we knew the maple and bacon combination had to be on our menu. I experimented with different shapes before settling on the snail shell.
Essentially it’s slices of bacon rolled inside a soft buttery pastry with maple syrup-flavoured glazed layers of flakiness – simple ingredients but jammed with flavour. It’s a recipe that takes time, patience and love, but taste it once and you’ll be convinced it’s the perfect way to kick off a weekend.” – Florin Grama, head baker at Pophams Bakery

You will need:
- 12 rashers good quality smoked streaky bacon (see Florin’s tips)
- 250g good quality unsalted butter, at room temperature (see Florin’s tips)
- 3 tbsp maple syrup, plus extra to brush
For the dough
- 110ml water, chilled
- 110ml whole milk, chilled
- 16g fresh yeast
- 230g Type 55 flour (see Know-how and Florin’s tips), plus extra to dust
- 230g strong white bread flour
- 10g good quality butter (at least 82% fat)
- 45g caster sugar
- 1½ tsp fine sea salt
You’ll also need…
- 2-3 baking trays lined with non-stick baking paper
Florin’s tips for success
- Use the best quality butter and flour you can afford. I use Président butter, which has 82% fat.
- A cool kitchen is vital for success. Cooking the bacon the night before helps keep the kitchen temperature down.
- Keep all the ingredients cool when making the pastry.
- The dough really does need all that time to rest – otherwise you risk overworking the gluten, which will make the pastry tough.
- If you don’t have a proving setting on your oven, an airing cupboard will do – check the temperature is about 25°C using a digital thermometer. Proving times can vary so if it’s cooler you might need to leave the danish to prove for longer.
- If you need pastries early in the morning, you can bake them the night
Make ahead
Start the recipe the day before you want to eat (see also Florin’s tips).
Food team tip
You can freeze the pastries for up to 4 days at the end of step 12, then defrost, prove and finish the recipe.
Know how
Type 55 (T55) is a special very fine French bread flour often used to make baguettes. You can buy it online at shipton-mill.co.uk. If you prefer, you can use 380g strong white bread flour and 80g plain flour. the result will still be wonderful but not quite as light.
Makes 12-15. Hands-on time 1 hour 45 min, oven time 15 min, plus chilling & overnight resting
1. Day one: Make the dough. Combine the water, milk and yeast in a mixing bowl. Add the flours and 10g butter, then the sugar and salt, and bring it all together with your hands to form a shaggy dough.

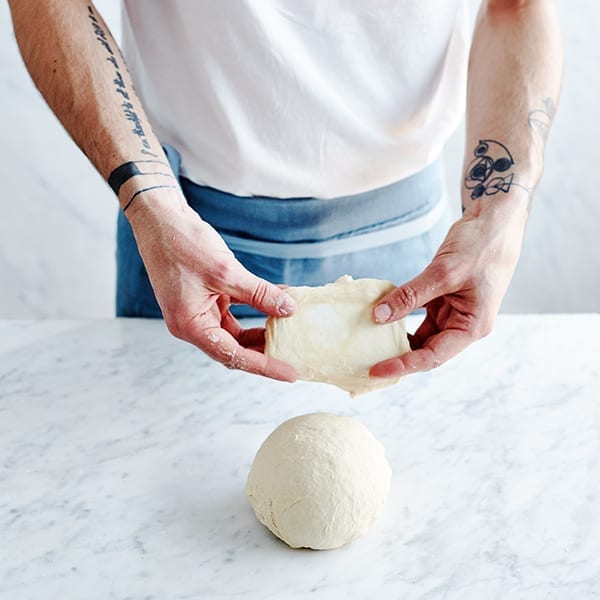
2. Tip the dough onto a lightly floured work surface and knead for about 12 minutes until smooth and elastic. Check the dough is ready using the ‘window test’: tear off a small piece of dough and pull it apart slowly; it should become thin enough to let some light through, like a window.
3. Lightly flour a clean mixing bowl and put the dough inside. Cover loosely with cling film and rest for 12 hours or overnight in the fridge.
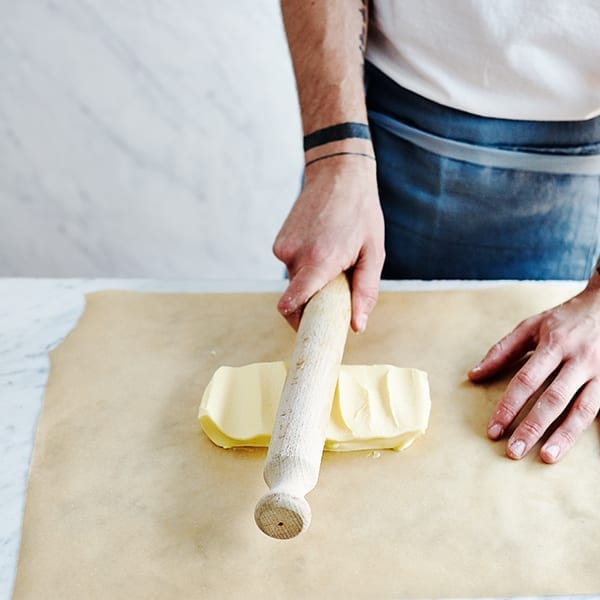
4. Heat the oven to 200°C/180°C fan/gas 6. Put the bacon on a baking sheet lined with non-stick baking paper and bake for 12-15 minutes until cooked but not crisp. Set aside (see Florin’s tips). Put the 250g pack of butter in the centre of a large sheet of baking paper and flatten it by bashing it firmly along its length using a rolling pin.
5. Once it has softened a bit, fold the edges of the paper over to enclose the butter in a 20cm x 25cm rectangle.
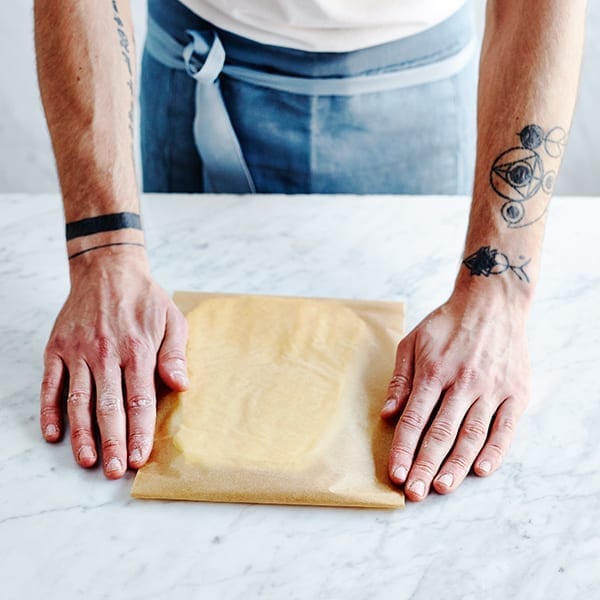
6. Continue to bash and roll the butter so it fills the rectangle right into the corners and is a consistent thickness. You should end up with a flat 20cm x 25cm rectangle of butter. Chill in the fridge for several hours or overnight until firm (see Make Ahead).
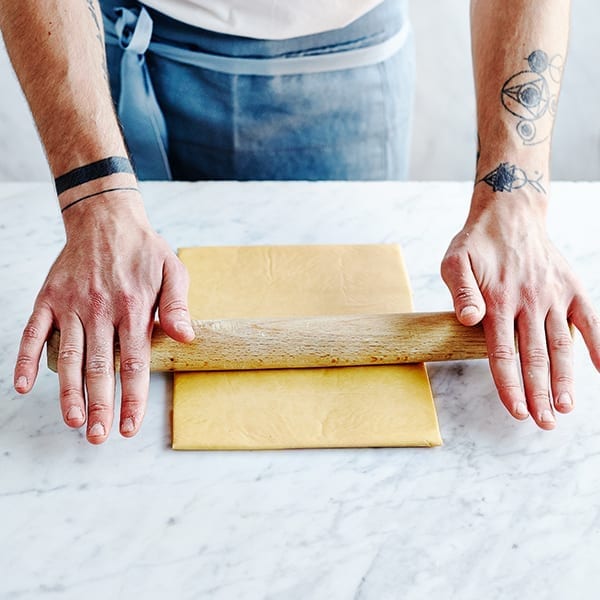
7. Day two: Roll out the dough on a lightly dusted surface to a rough 25cm x 40cm rectangle. Remove the butter rectangle from the fridge and let it soften for a few minutes. Put the butter in the centre of the dough, with the 25cm edges running parallel and about 10cm dough coming out either side of the butter. Bring the edges of the dough up and over the butter to enclose it and join in the middle.
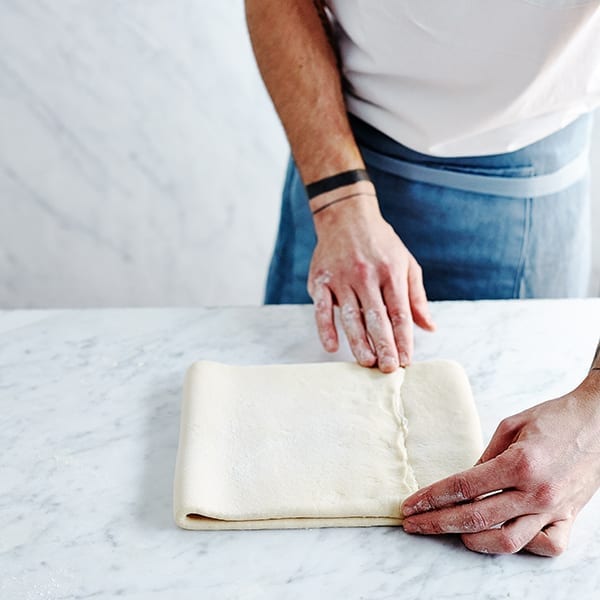
8. With the folded line running vertically and facing upwards, roll out the dough to a 55cm x 20cm rectangle. Using a sharp serrated knife, trim the short ends slightly so they end neatly and you can see the butter layer. Turn the dough 90 degrees and fold over one side two-thirds of the waY, then bring the other side over the first fold, like you’re folding a letter. Wrap the dough in cling film and chill in the freezer for around 30 minutes (don’t let it freeze).
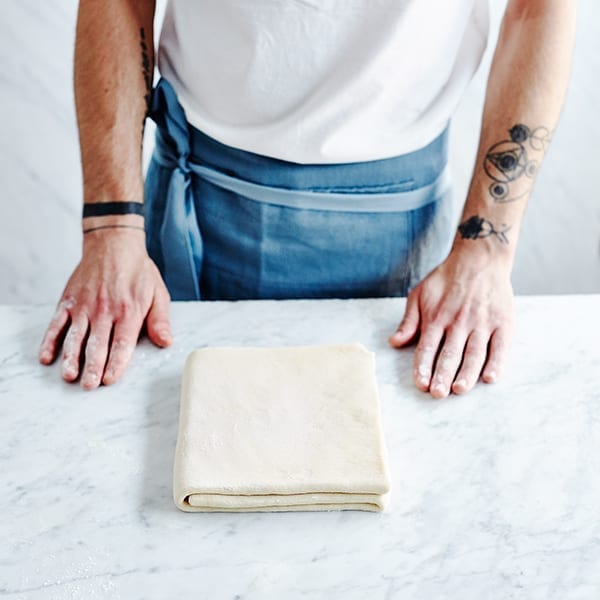

9. Put the folded dough on a lightly dusted work surface with the open end of the fold on the left-hand side [as above]. Roll out again to 55cm x 20cm and trim as before. Turn 90 degrees, then fold the dough in from the left to a quarter of the length and bring the other end up to meet it.


Fold in half, bringing the right edge over to meet the left edge [M]. Wrap in cling film and chill in the freezer for up to 30 minutes.
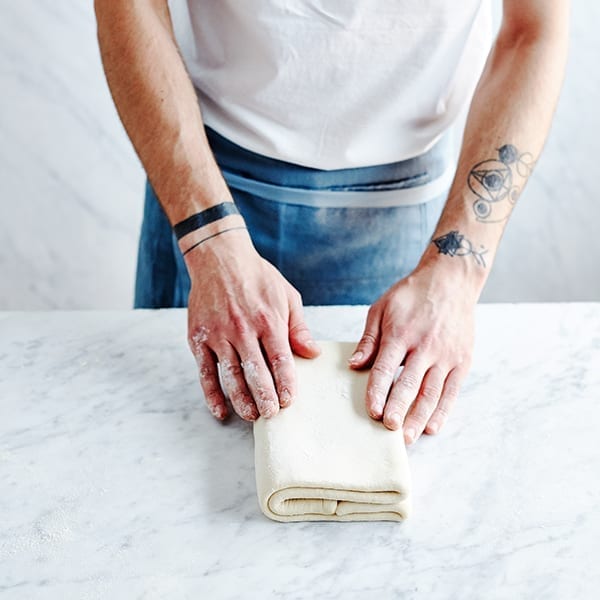

10. Put the dough on a lightly floured work surface and dust the top lightly with flour too. With the open fold to the right-hand side, roll out the dough to a rough 30cm x 15cm rectangle. Wrap in cling film and chill again in the freezer until firm.
11. Return the dough to the floured work surface and roll out to a 60cm x 25cm rectangle. Brush with maple syrup (don’t be too generous) then, with the long side towards you, arrange the bacon in vertical lines all the way along the dough.
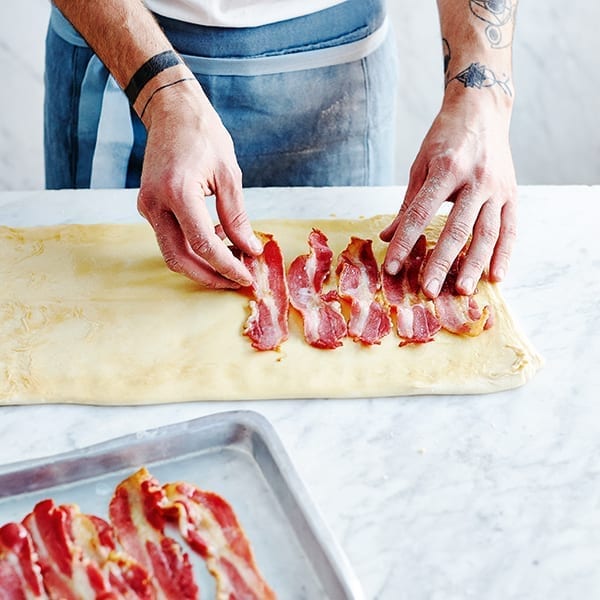

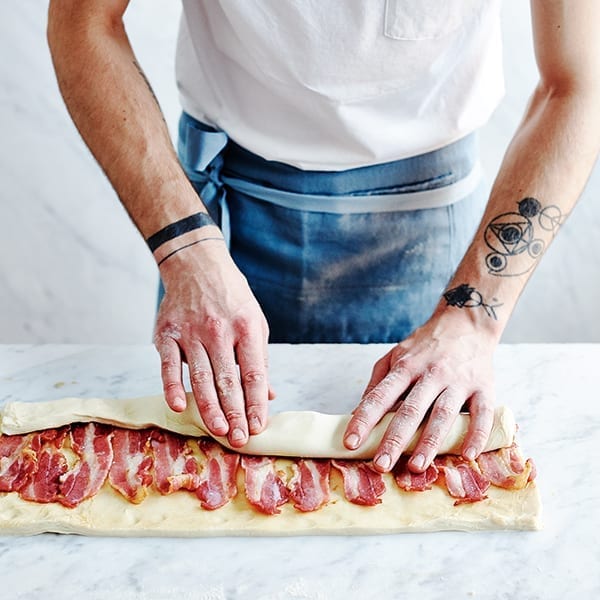
Trim the edges of the dough with a sharp serrated knife to create even sides. Roll up the dough from the long side near to you to create a long roulade, then wrap in cling film and chill in the freezer for 30 minutes. If you don’t have room in the freezer, chill for longer in the fridge instead.

12. Remove the roulade from the fridge/freezer and, using a sharp serrated knife, cut into 12-15 x 4cm pieces and put onto the prepared baking trays. Put the trays in the fridge or freezer to chill again for a few minutes (see Make Ahead).
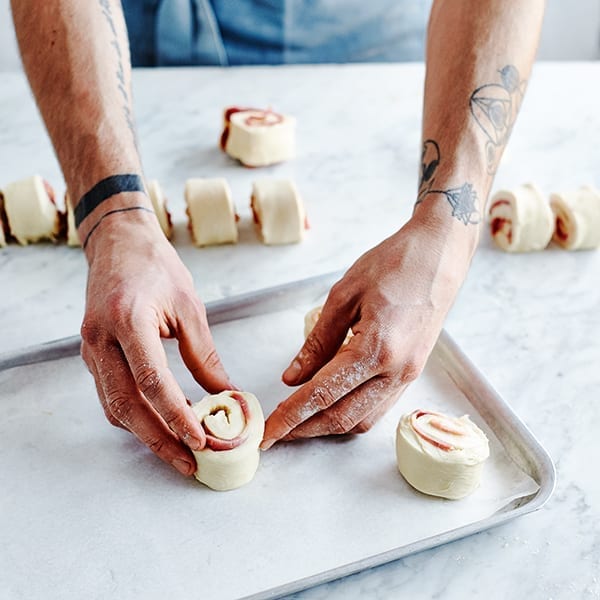

13. If you have a proving setting on your oven, set it to 25°C. Cover the pastries loosely with lightly oiled cling film and put in the warm oven for 1 hour 20-30 minutes. Otherwise, prove the pastries in an airing cupboard or a warm part of your kitchen for around the same amount of time (see Florin’s Tips For Success). They should almost double in size, expanding so you can start to see the layers of pastry.
14. Once the pastries have proved, heat the oven to 200°C/180°C fan/gas 6. Remove the cling film, then put the pastries in the oven and immediately reduce the temperature to 180°C/160°C fan/gas 4. Bake for about 15 minutes until golden brown. Remove from the oven and immediately brush the pastries with the extra maple syrup, then serve.


Subscribe to our magazine
Food stories, skills and tested recipes, straight to your door... Enjoy 5 issues for just £5 with our special introductory offer.
Subscribe

Unleash your inner chef
Looking for inspiration? Receive the latest recipes with our newsletter