How to make croissants
Follow baker Richard Bertinet‘s step-by-step guide for perfect buttery, flaky croissants. A top tip is to get everything weighed and ready before you begin – and ideally, you’ll allow the mix to rest overnight, although two hours is okay. This recipe makes 24 small or 14 large croissants.

Before you start
Use a strong bread flour and good unsalted butter, such as Lurpak. Croissants aren’t diet food, but you can use half the amount of butter for a lower-fat version. Get everything weighed and ready before you begin.
When rolling the dough use two smooth rolling pins – one straight and one tapered. The straight one does the hard work and the tapered one is for control. You can use just one, though. Take care with the amount of pressure you apply to the dough, work quickly, keep the dough on the move and don’t over-flour. Stop rolling before you reach the edge of the dough so you don’t squeeze the butter out.
Makes 24 small or 14 large croissants
Hands-on time 1 hour, resting and proving time 5-5½ hours, oven time 20 minutes
You will need
- 500g strong white flour, plus extra to dust
- 20g fresh yeast
- 10g fine sea salt
- 50g caster sugar
- 55g free-range egg (shelled weight; equivalent to about 1 large egg), plus 1 free-range egg to make an egg wash
- 125g cold milk
- 125g cold water
- 200g good quality unsalted butter, straight from the fridge
Key equipment
- Plastic tray or choping board that will fit in the fridge
- Dough scraper (available from most cookshops and online)
- Large freezer bags, split
- Rolling pin (ideally two – one straight and one tapered)
- 2 baking trays
1. Put the flour in a mixing bowl, then rub in the yeast with your fingertips. Stir in the salt and sugar. Add the 55g egg, milk and water, then mix using a dough scraper. When everything comes together into a dough, use the scraper to turn it out onto the work surface (don’t flour it). Or you can put all these ingredients together in a mixer (liquids first) and mix with a dough hook for 3-4 minutes on a slow speed.
2. Work the dough, stretching it and folding it over itself, for 4-5 minutes. Form into a ball and cut a cross in the top with a knife (this will help the dough relax while resting). Put in a lightly floured mixing bowl. Cover with a large, split freezer bag secured with an elastic band, then rest in the fridge for at least 2 hours, preferably overnight.
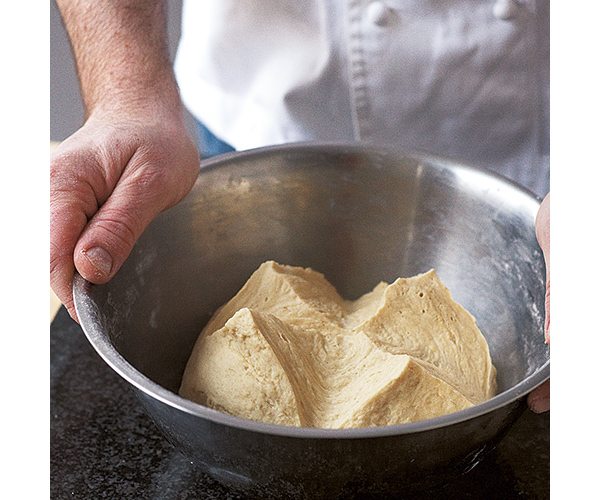
3. Lightly flour the work surface. Turn out the dough then, starting in the centre of the cross, roll out the 4 corners until you have a square that’s approximately 25cm.
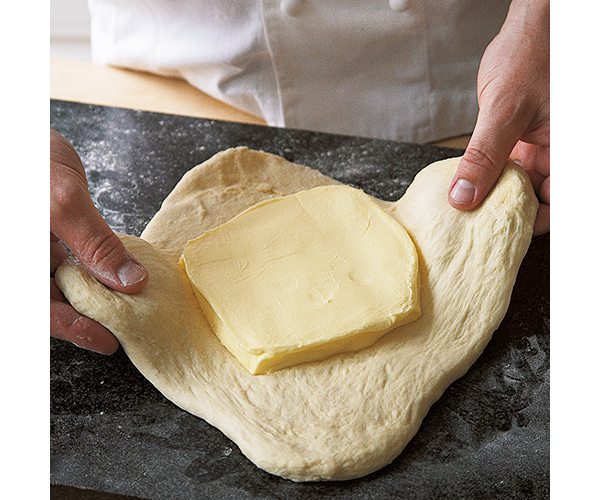
4. Open the pack of butter but leave it sitting on its wrapper with a split freezer bag or piece of baking paper over the top. Use a rolling pin to flatten the butter into a square, tapping it gently (the bag/baking paper will prevent the rolling pin from becoming greasy). Turn the butter over, wrapper and all, and tap again until about 1cm thick and the square is about 13cm.
5. Remove the wrapper and set aside (use to grease the baking trays later), then use the bag/baking paper to lift the flattened butter and turn it over onto the centre of the dough square – the aim here is to touch the butter as little as possible to avoid warming it up. Remove the bag/paper.


6. One at a time, fold the 4 sides of the dough over the butter. Using a rolling pin and rolling lengthways only, roll out into a rectangle 2-3 times longer than the original length (about 60-70cm).
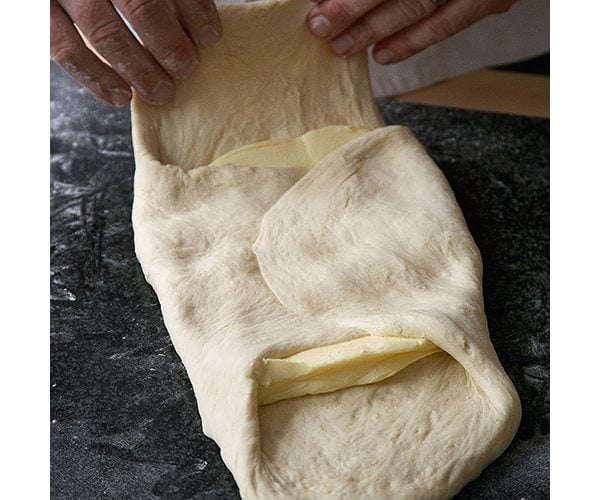

7. Keep your hands at either end of the rolling pin, outside the dough area, and be gentle – this helps distribute the pressure evenly, so the dough ends up the same thickness all over. If you rest your hands in the middle of the pin, the pressure will make a dent in the centre of the dough. Each time you roll, gently lift the dough and move it around slightly on the work surface to stop it sticking.
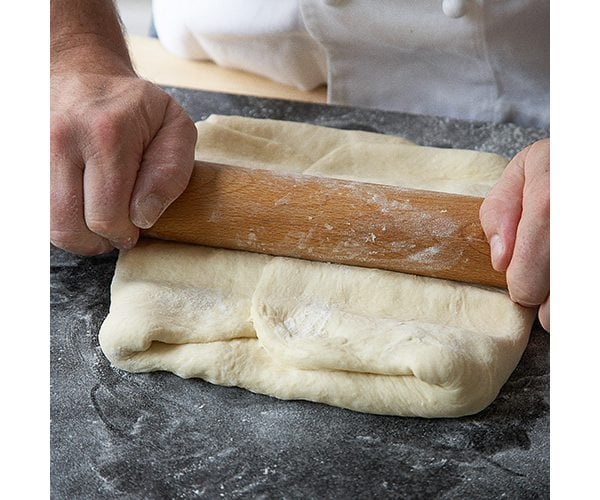

8. Fold into thirds: top third into the middle, then bottom third on top, as if you were folding a letter.
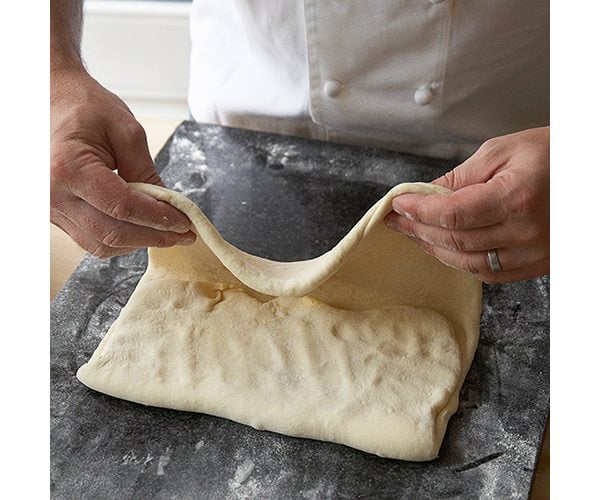

9. I make an indent in the top of the dough to remind myself I’m at the first folding stage. Lift onto a plastic tray or board, cover with a split freezer bag and chill for 20-30 minutes.
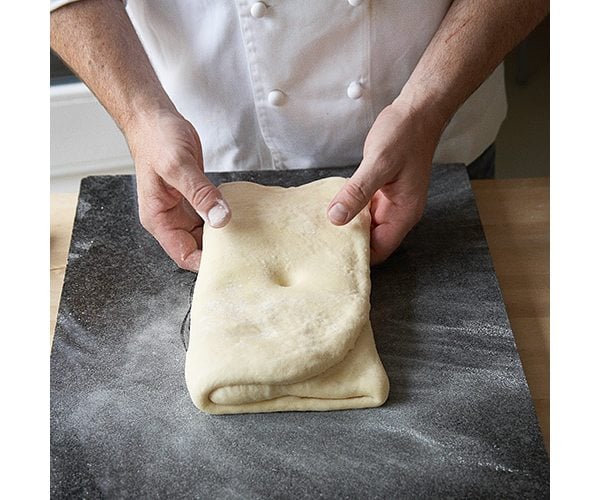

10. Beat the remaining egg with a pinch of salt to make an egg wash. Take the tray/board out of the fridge, remove the bag and put the dough on a lightly floured surface with the short end facing you. Use a rolling pin to roll it lengthways as before, then fold into thirds again, always folding in from the short ends (I now make 2 indents in the top). Put the dough back on the plastic tray/board, then cover again with the freezer bag and return to the fridge for a further 20-30 minutes.
11. Repeat the rolling and resting process once more (this time make 3 indents).
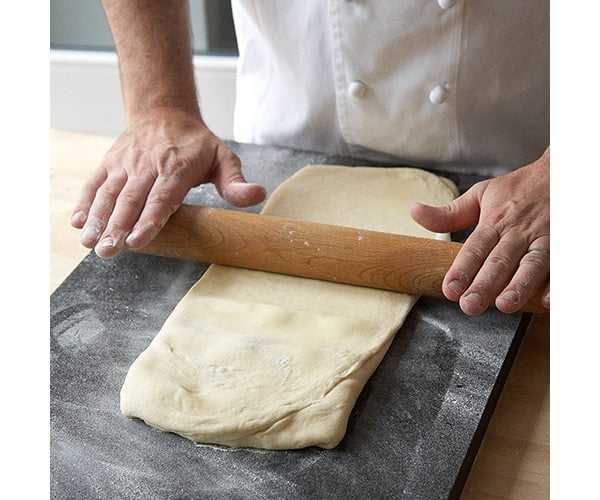

12. Roll out the dough to a rectangle 30cm x 75cm and 4mm thick. With a large, sharp knife, cut lengthways down the middle and trim the edges to make a neat rectangle. Discard the trimmings.
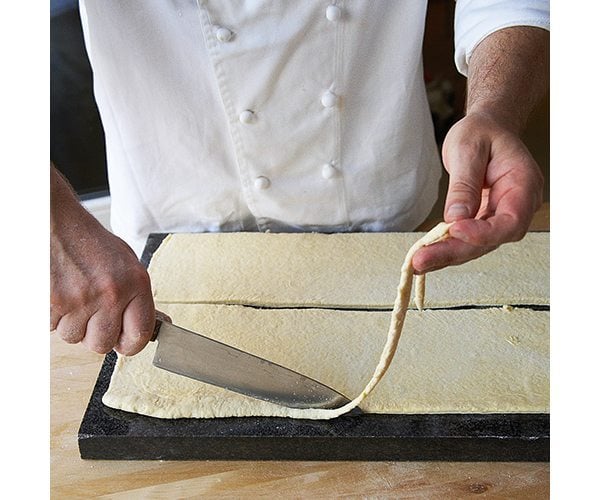

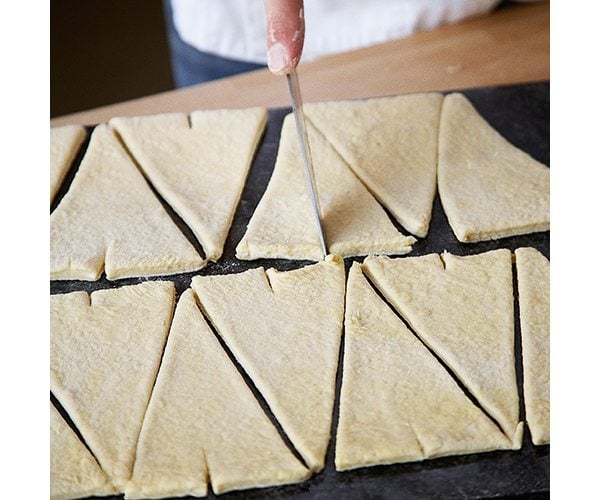
13. Cut each strip into 7 large (or 12 small) triangles, making the base of each large triangle about 9cm and the sides about 15cm. Make a small vertical cut in the base of each triangle.

14. Roll each triangle up from the base, pulling gently at the splits you’ve made. Don’t crush the dough. Continue rolling, then gently roll back and forth briefly with your fingertips to seal.
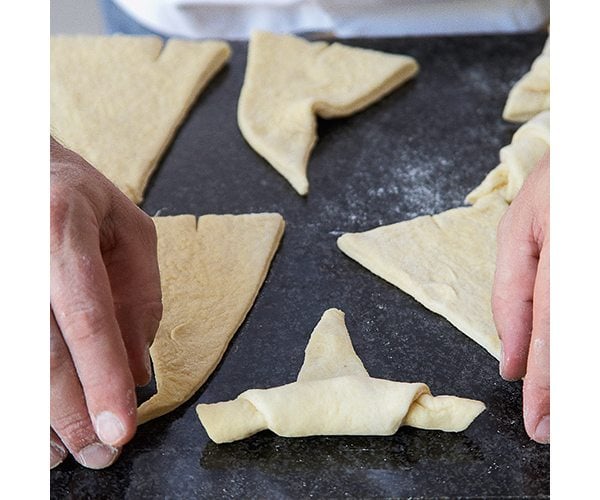

15. Brush the tops of the croissants with the egg wash, brushing lightly from the centre outwards so you don’t get any excess sticking the folds together. Put on the greased baking trays, leaving space in between to let them expand.
16. Leave the croissants to prove in a warm place such as a cupboard, big drawer or turned-off microwave for about 2 hours. Twenty minutes before the croissants are ready, heat the oven to 220°C/fan200°C/gas 8.
17. Glaze the proved croissants again with the egg wash. Turn the oven to 190°C/fan170°C/gas 5, then bake the croissants in the oven for 15-20 minutes until golden. Cover with foil if they’re browning too quickly and, if they’re baking unevenly, move the croissants and/or the trays around accordingly. Avoid opening the oven door too much early on in the cooking process, though, as this may knock the air out of the croissants and affect the rise. Put on wire racks to cool, then serve. They’re great with apricot jam.


Richard’s tips for success
Shape
Cutting a slit in the pastry triangles makes it easier to roll and shape the croissants.
Glaze
As an apprentice, I was taught to make an egg wash with salt, then leave it for an hour before using. The salt breaks down the egg to make it more liquid and easier to brush over the pastry, while leaving the wash to rest helps the croissants brown once glazed.
Prove
An enclosed space away from drafts is best for proving croissants, so they don’t form a crust before they go in the oven. The ideal temperature is 26-28°C. Don’t rush the proving process – if the dough becomes too warm it will start to ooze butter, making the croissants heavy rather than flaky.
Recipe extracted from Crust by Richard Bertinet (£16.99; Kyle Books)
Richard Bertinet photo credit: Jenny Zarins
Subscribe to our magazine
Food stories, skills and tested recipes, straight to your door... Enjoy 5 issues for just £5 with our special introductory offer.
Subscribe

Unleash your inner chef
Looking for inspiration? Receive the latest recipes with our newsletter
